Optional
Virtual environment
Create an isolated Python environment for one project before installing packages.
Open the terminal
Open your project folder in VS Code, then open the integrated terminal with Ctrl + Shift + ` on Windows or Cmd + Shift + ` on macOS.
Run the commands from the project folder. This keeps the virtual environment next to your code.
Create .venv
On Windows PowerShell:
py -m venv .venv
.\.venv\Scripts\Activate.ps1
On macOS or Linux:
python3 -m venv .venv
source .venv/bin/activate
After activation, the terminal prompt should show (.venv). If VS Code asks which interpreter to use, choose the Python interpreter inside .venv.
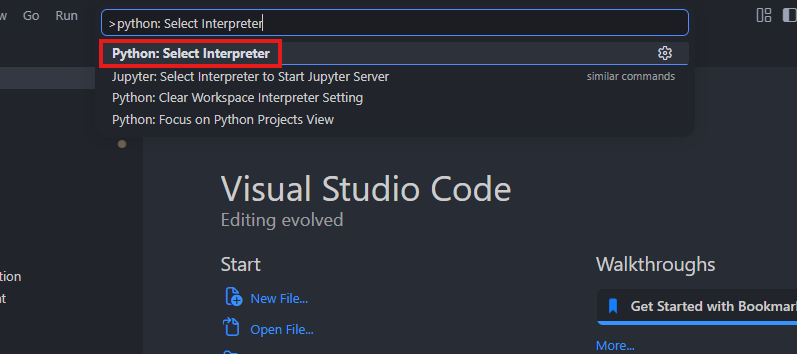
Select the Python interpreter
Tell VS Code to use the Python executable inside .venv.
Open the Command Palette with Ctrl + Shift + P on Windows or Cmd + Shift + P on macOS, then run Python: Select Interpreter.
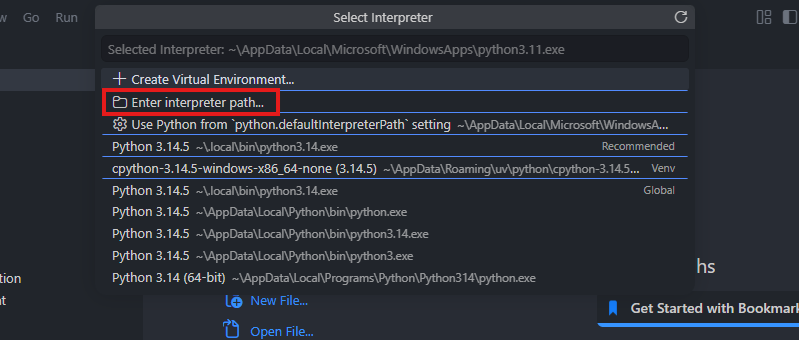
If the picker shows an interpreter from your project .venv, choose that item. It is usually labeled as a virtual environment or shows a path inside .venv.
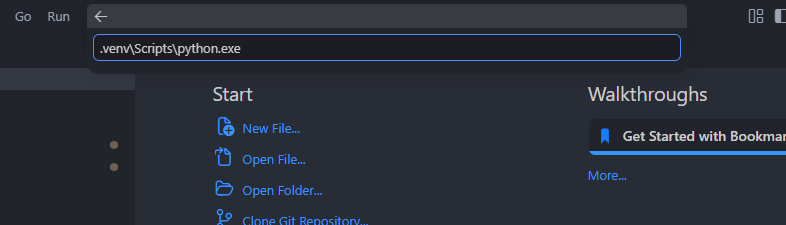
If .venv does not appear in the list, choose Enter interpreter path… and select the interpreter manually:
- Windows:
.venv\Scripts\python.exe - macOS or Linux:
.venv/bin/python
Do not choose a global Python entry unless you intentionally want to install packages outside this project.
Verify the interpreter
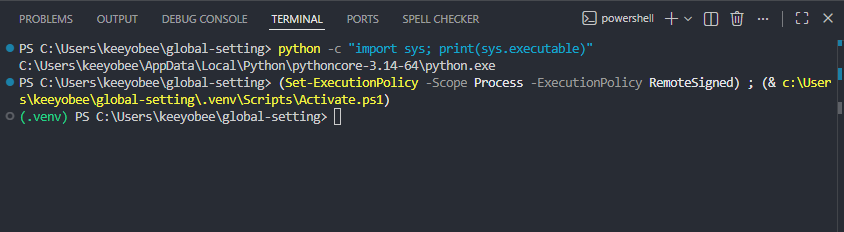
After selecting the interpreter, check the Python path from the VS Code terminal.
python -c "import sys; print(sys.executable)"
The output should point inside your project .venv folder.
On Windows, it should end like this:
\.venv\Scripts\python.exe
On macOS or Linux, it should end like this:
/.venv/bin/python
You can also check the selected interpreter shown in the VS Code status bar. It should refer to .venv, not a global Python installation.
VS Code may automatically run the activation script when the terminal opens or after you change the interpreter. This is normal. If the prompt changes to (.venv) after your first check, run the path check again from that activated terminal.
Install NumPy in .venv
Install packages only after .venv is active. The terminal prompt should show (.venv) before you run these commands.
python -m pip install --upgrade pip
python -m pip install numpy
On Windows, py is the Python Launcher. If python is not recognized, first check that py points to this project’s .venv:
py -c "import sys; print(sys.executable)"
Use py only if the printed path contains .venv\Scripts\python.exe. Then install packages with:
py -m pip install --upgrade pip
py -m pip install numpy
Check that NumPy is available:
python -c "import numpy as np; print(np.__version__)"
If you installed with py, use py -c "import numpy as np; print(np.__version__)" for this check.
Use this pattern for other project packages as well. Create one .venv per project instead of installing research dependencies globally.
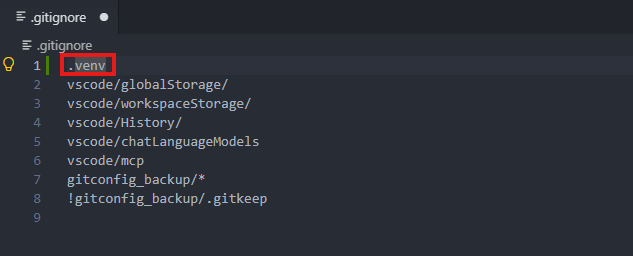
Add .venv to .gitignore
Do not commit .venv to Git. It contains local installed packages and can become very large.
Add this line to your project .gitignore file:
.venv/
If you need a refresher on excluding files from Git, see Gitignore.