Step 3
Connect GitHub
Open the VS Code terminal, set your global Git name and email, and confirm the settings before creating a repository.
Open the terminal
Use the Command Palette to open a fresh terminal inside VS Code.
Open the Command Palette, search for terminal, and select Terminal: Create New Terminal. Open it with Ctrl+Shift+P (macOS: Cmd+Shift+P).
.png)
After the command runs, confirm that the integrated terminal appears at the bottom of VS Code.
You can also open a new terminal directly with Ctrl + Shift + ` on Windows or Cmd + Shift + ` on macOS.
.png)
Set name and email
Set the name and email that Git will attach to commits made from this machine.
Run the name command first. Replace NAME with the name you want to appear in your commit history.
git config --global user.name "NAME".png)
Then run the email command. Use the email address that belongs to the GitHub account you prepared.
git config --global user.email "EMAIL".png)
Verify the configuration
Check the saved configuration before moving on.
git config --list
Run git config --list in the same terminal.
.png)
In the output, confirm that user.name and user.email match what you entered. You only need to do this setup once on the same machine.
.png)
Sign in when prompted
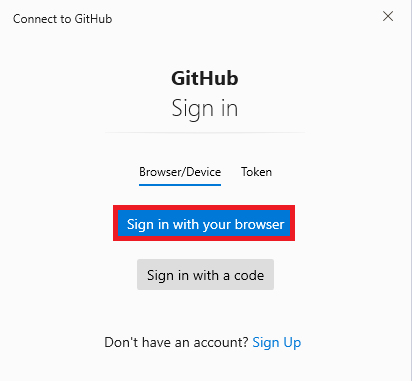
At some point VS Code may ask you to sign in to GitHub. If you see a prompt with Sign in with your browser, click it and complete the GitHub login in the browser.
Use the browser sign-in option for the normal GitHub login flow.
If git config --list shows the correct name and email, and any GitHub sign-in prompt has been completed, continue to repository creation.