Topic 2
Create Repository
Create an empty private repository on GitHub. In the next step, clone it and add your project files.
Choose the repository shape
Choose the GitHub account that will own the new repository, and set its visibility to Private.
Create an empty private repository
Choose a repository name that identifies the project. You will clone an empty repository in the next step, so leave the README, .gitignore, and license options unset for now.
Sign in to GitHub, then open the Repositories tab on your profile.
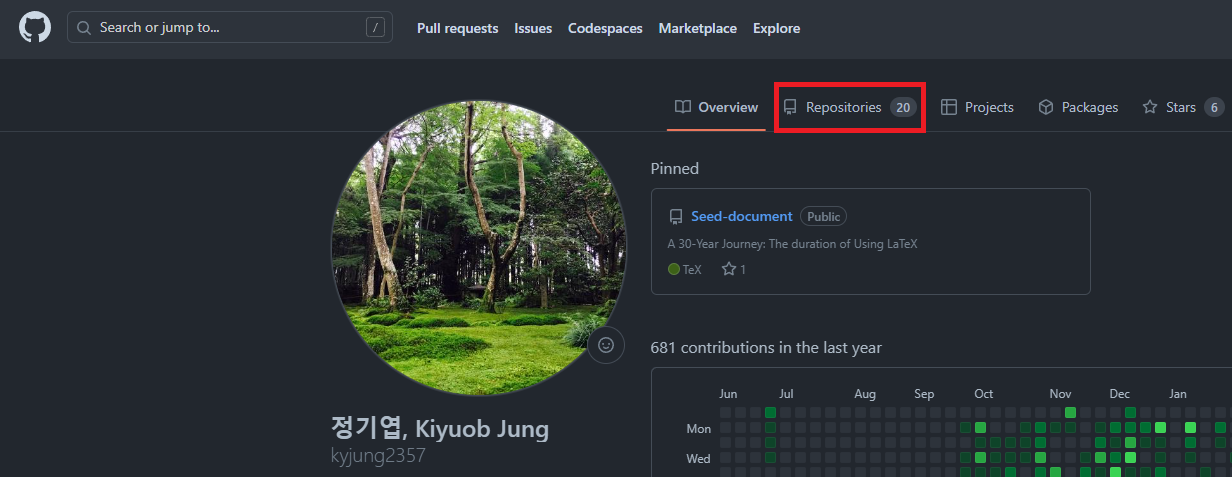
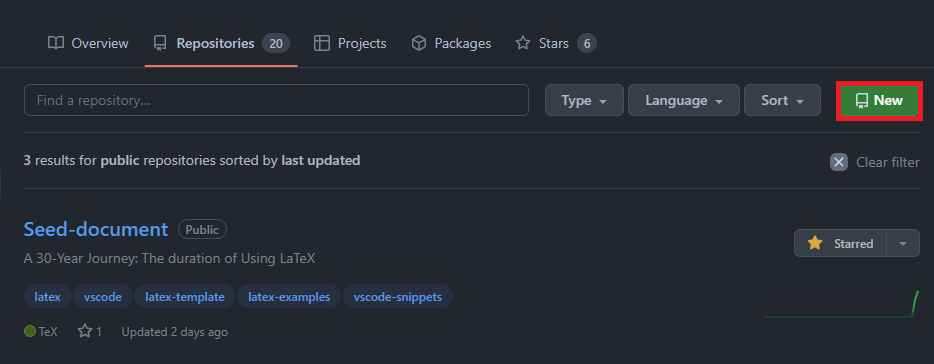
Select New on the Repositories page. If your screen looks different, open GitHub's new repository page directly.
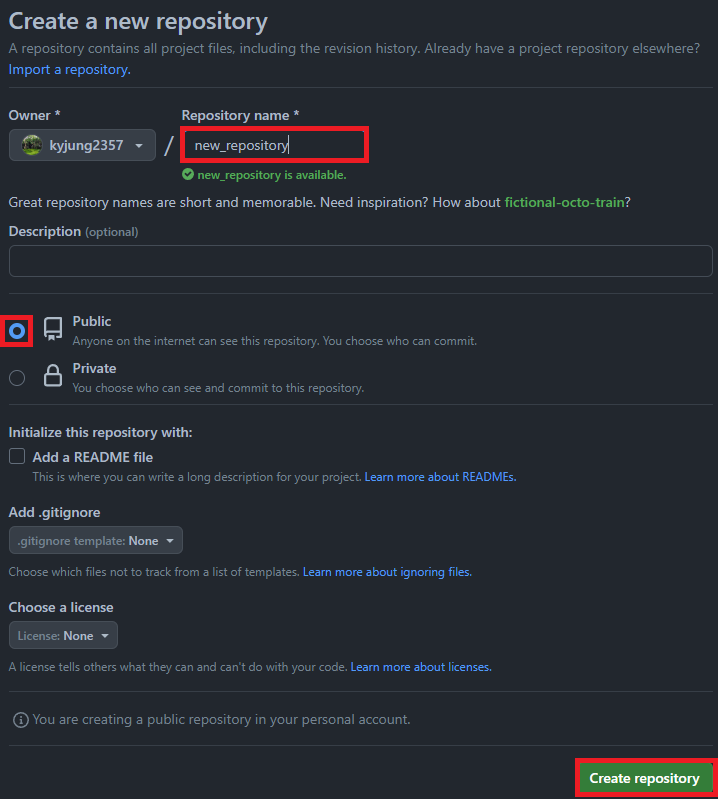
Check Owner and Repository name, then select Private. Leave README, .gitignore, and license unset, and select Create repository.
The older image shows Public selected. Select Private for this guide.
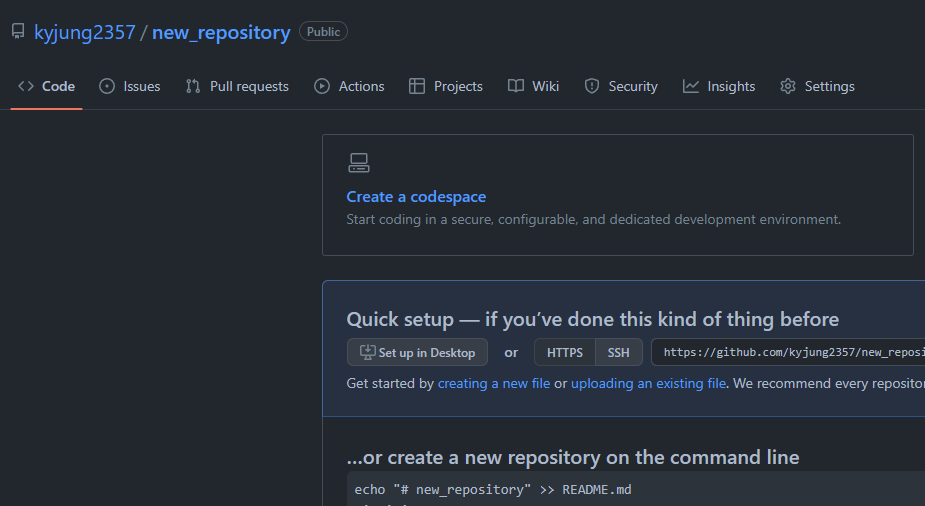
Check the Private label beside your repository name and the Quick setup instructions for an empty repository. The image below is a location example for Quick setup; it shows an older public repository. Confirm that your own repository is Private.