
Topic 4
Conflict
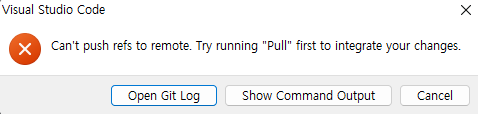
On Windows, review conflicting edits during Pull in VS Code and complete the merge.
When conflicts occur
If the remote has new commits and your push is rejected, first run git status to check local changes. This guide covers the case where Pull starts a merge after you have prepared your local work, and the merge finds conflicting edits.
If your local branch and the incoming branch changed the same part differently and Git cannot combine them automatically, a conflict occurs. Edit each conflicting section into the content you want to keep.
Select Cancel in the push warning. Before pulling, run git status and commit the intended source changes or Stash unfinished work. Check again for unexpected changes, then Pull.
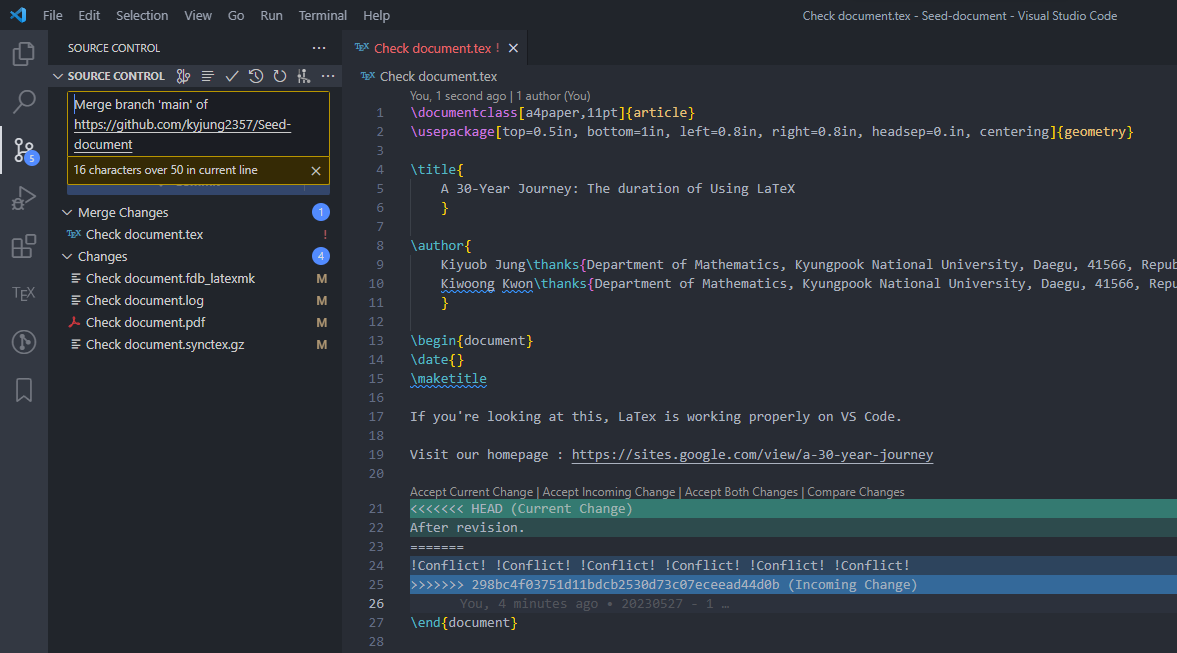
If Pull produces a conflict, the file appears under Merge Changes in Source Control. In the older screenshot, Current Change is from your local branch and Incoming Change is from the fetched branch. Generated files such as .log and .pdf under Changes do not need to be staged to resolve the conflict.
Edit conflicting sections
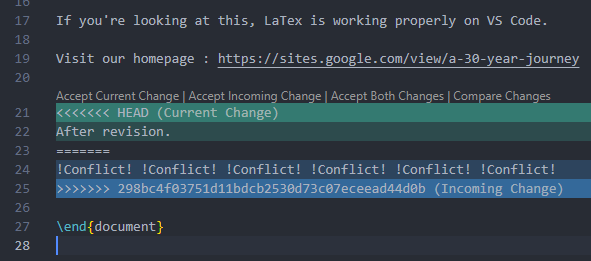
Open the conflicted file and decide the final content of each section. The inline actions in the older screenshot apply to the selected conflict section.
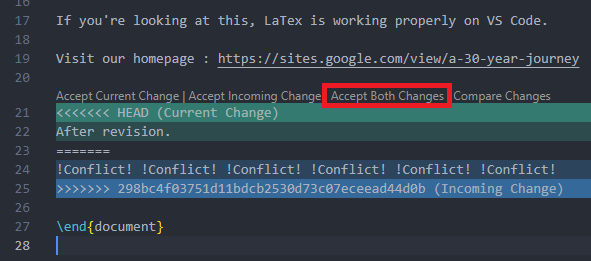
Accept Current Change: keep the current branch’s content.Accept Incoming Change: keep the incoming branch’s content.Accept Both Changes: place both versions one after the other. Check their order and duplication, then edit as needed.- Edit manually: combine parts of both versions or write new text, then remove the conflict markers.
Accept Both Changes places the two versions one after the other. The older result image still contains !Conflict! text, so it does not show a finished document. Edit duplicated or incompatible content into the intended final text, save the file, and then build it.
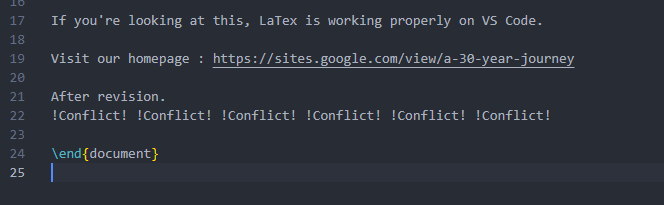
After saving the edited file, use these commands to inspect unresolved entries, remaining conflict markers or whitespace errors, and the combined content:
git status
git diff --check
git diff
Build the document and review the result, then stage only the resolved source file. Passing git diff --check does not replace reviewing the file and build output for correctness.
Complete the merge
In Source Control, stage only the resolved TeX source file under Merge Changes. Check the staged files with git status and git diff --cached.
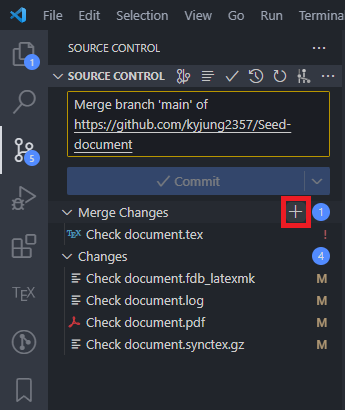
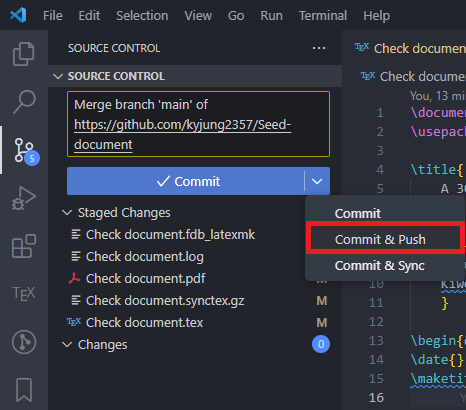
The + beside Changes in the screenshot stages all files. In your own work, select only the .tex, .bib, and other source files you need; exclude generated files such as the .log and .pdf files shown. If Staged Changes contains an unwanted file, click - beside that file to unstage it.
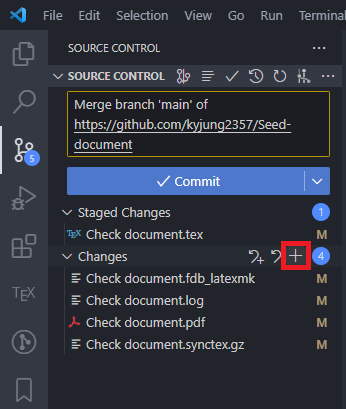
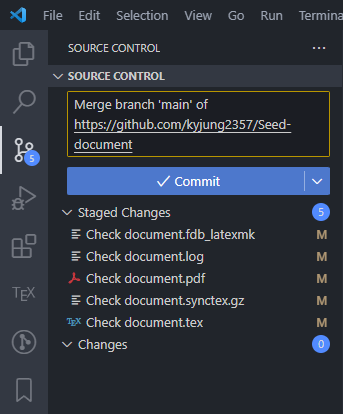
After reviewing the staged source files and build result, select Commit to complete the merge, then Push. The screenshot below shows where to find Commit & Push. Before using it, unstage unwanted generated files and finish reviewing the merge result.
Run git status to confirm that no merge remains in progress. Generated build files may still be in the working tree. If you temporarily stored work before Pull, reapply it after the merge and check the resulting status.